Have you ever encountered a problem where you can’t access the data stored on your USB drive? Losing valuable information from a damaged USB stick due to hardware or software issues can be extremely stressful.
Recovering data from a malfunctioning USB drive has become more complicated due to the complexity of newer devices and technologies. However, there are still some options available to retrieve lost data.
In this article, we will provide you with step-by-step instructions on how to retrieve data from a damaged USB stick in 2023. We will cover important topics such as using third-party tools, restoring data using Windows system restores, and accessing hidden files on damaged drives.
With these tips and tricks at your disposal, you can quickly restore all of your precious files!
Step-by-Step Instructions for Retrieving Data From a Damaged USB Stick Without Third-Party Software
Retrieving data from a damaged USB stick can be a challenging task, but it is possible to recover the data without using third-party software. Here is a step-by-step guide on how to retrieve data from a damaged USB stick:
Step 1: Connect the USB stick to your computer
Connect the damaged USB stick to your computer using a USB cable.

Step 2: Check the USB stick in Disk Management
Open the Disk Management tool on your computer by searching for “Disk Management” in the Start menu. Look for the USB stick in the list of drives and check if it’s showing up as “Unallocated” or “Not Initialized.” If it is, you can try initializing it and creating a new partition on it.

Step 3: Check the USB stick in Command Prompt
If the USB stick is not showing up in Disk Management, open Command Prompt by searching for “cmd” in the Start menu. Type “chkdsk [drive letter]: /f” (without the quotes) and press Enter. This will check for errors on the USB stick and attempt to fix them.

Step 4: Try accessing the USB stick in Safe Mode
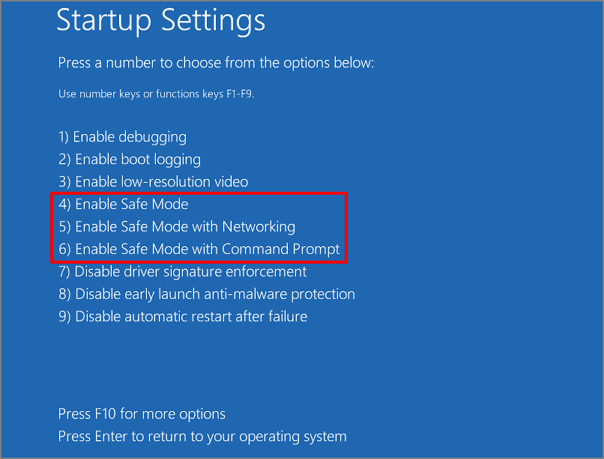
If the USB stick still isn’t showing up in Disk Management or Command Prompt, try accessing it in Safe Mode. Restart your computer and press F8 to enter Safe Mode. Once in Safe Mode, check if the USB stick is showing up in Disk Management or Command Prompt.
Step 5: Use Data recovery software (See below)
If the USB stick is still not showing up after trying the above steps, you can try using data recovery software to retrieve the data. There are many software options available for free or for purchase.
Step 6: Contact a professional data recovery service
If you are unable to retrieve the data from the damaged USB stick using the above steps, you may need to contact a professional data recovery service. They will have specialized equipment and techniques to recover the data from damaged USB sticks.
It’s important to note that the above steps may not be able to recover all the data from a damaged USB stick, and the success of the recovery may vary depending on the extent of the damage.
Software & Tools For Retrieving Data From a Damaged USB Sticks
Retrieving data from a damaged USB stick can be a daunting task, but there are many strategies and tools available to help. With the proper precautions, it is possible to salvage data from even the most damaged hardware.
Some of these tools include software that scans for deleted files or those which have had their locations shifted within the drive, free programs used to access unreadable sectors, and repair utilities that fix potential problems related to physical damage or corruption. With the right combination of tools and knowledge, retrieving data from corrupted USB sticks is possible and can save you valuable time and money in the long run.
1. EaseUS Data Recovery Wizard
This is a powerful data recovery software that can help you recover lost or deleted files from USB sticks, including photos, videos, documents, and more.
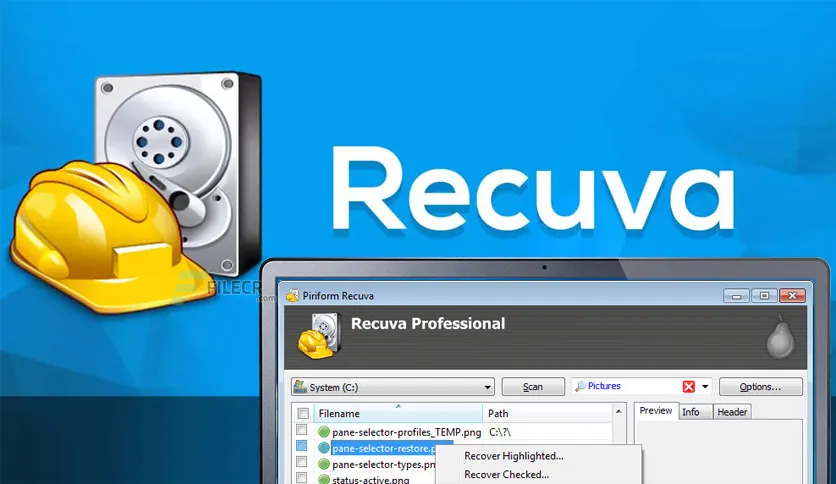
2. Recuva
This is a free data recovery tool that can be used to recover files from damaged USB sticks. It has an easy-to-use interface and supports multiple file types.
3. TestDisk
This is an open-source tool designed to help users recover lost partitions and repair corrupted drives. It can also be used to retrieve data from a damaged USB sticks.
4. PhotoRec
This is another open-source tool designed for recovering lost files from storage devices such as USB sticks. It supports various file formats and can even recover deleted files from formatted drives.
5. R-Studio
This is a powerful data recovery software that can be used to recover data from damaged USB sticks as well as other storage devices such as hard drives and SSDs.
In conclusion, there are a variety of strategies and tools available to help users recover data from damaged USB sticks.
From powerful software such as EaseUS Data Recovery Wizard and R-Studio to free programs like Recuva and TestDisk, users have access to a range of options for retrieving lost or corrupted files. With the right combination of tools and knowledge, it is possible to salvage data from even the most damaged hardware.
9 Quick Tips for Reducing the Chance of Data Loss in the Future
There are several ways to reduce the chance of data loss in USB sticks in the future. One of the most effective ways is to regularly back up the data stored on the USB stick.
This can be done by copying the files to another storage device, such as an external hard drive or cloud storage service. Additionally, you can use software that automatically backs up your data on a schedule.
1. Back up your data regularly
One of the best ways to reduce the chance of losing data on USB sticks is to back up the data on them regularly. This can be done by copying the files to another storage device, like an external hard drive or a cloud storage service.
2. Keep a backup of your important files
Back up your important files in more than one place. This way, if you lose your important files or data, you will always have a copy.
3. Don’t overfill the USB stick
Don’t fill the USB stick up, because that can cause data loss and shorten the stick’s life.
4. Be careful with the USB stick
Don’t expose it to extreme temperatures, physical damage, or moisture, as these things can damage the USB stick and cause data to be lost.
5. Use the “safely remove hardware” option
When removing the USB stick from the computer, make sure to use the “safely remove hardware” option to safely eject the USB stick and prevent data loss.
6. Check the device’s S.M.A.R.T status
The Self-Monitoring, Analysis, and Reporting Technology (S.M.A.R.T.) was developed to automatically monitor and detect signs of a failing hard drive.
In Windows 10, search for “Performance Monitor” and launch the utility to generate a system diagnostic report.
Begin by selecting “Data Collector Sets” from the left column, then select “System” from the right side, which should display System Diagnostics and Performance options.
To begin the process, right-click on the “System Diagnostics” option and select “Start.” It may take a few minutes.
Click “Reports” at the bottom of the left column list, then double-click “System” and then on the resulting item, which should be your report.
Scroll down to the “Basic System Check” section and click the + next to “Disk Checks” to view the SMART predict failure check results.
7. Use a reliable and high-quality USB stick
Choosing a reliable and high-quality USB stick can make it less likely that it will break or that you will lose data.
8. Use software to protect against viruses
Protect your computer with a good anti-virus program. This will stop malware and viruses from destroying your data and USB stick.
9. Label and organize your USB stick
Label and organize your USB stick so it’s easy to find the files you need. This will make it less likely that you’ll delete or overwrite important files by accident
Conclusion & Summary
In conclusion, retrieving data from a USB stick may seem daunting at first but with the right tools and techniques, it can be done quickly and easily. Whether you’re dealing with a physically damaged drive or a corrupted storage device, understanding how to troubleshoot these common issues will make your life much simpler down the road.
If you are unclear about the process and are hesitant to move further due to the risks, and you are dealing with a problem that is beyond the scope of this article. CBL Data Recovery Singapore specialists can help you properly recover your data and guide you step by step.
Hopefully, this article has helped you understand how to successfully retrieve data from a damaged USB stick in 2023 and beyond.
Read also – Recover Data from SD Card for Free 2023

